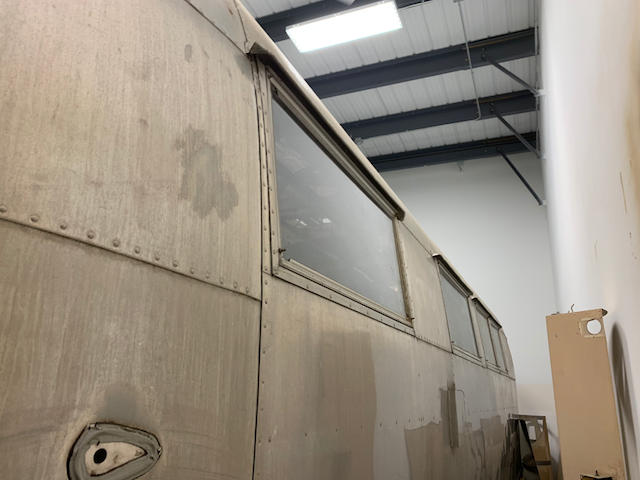
Hehr Clearview Window Removal

It was time for us to get started on the windows. As we’ve mentioned in previous posts, the gaskets around our windows were made from vinyl originally from the factory. At the time it was a great flexible material to use. Unfortuantely, over great periods of time, 59 years for example, vinyl begins to shrink. From the photos below, you can see that at some point the gaps in the gaskets were filled with caulk. So, it’s time to take out the windows so that we can re-seal and polish them up. The video below and shows how to remove the windows so that we can begin to get them in order!

The Aluminum Sourcing Saga

The Aluminum Sourcing Saga

Hey all! Sorry we’ve been so slow on the updates lately! There’s been a lot going on both good and bad! Kyle has been traveling a ton for his job the last few weeks so progress has slowed a bit. But, we’ve also had a couple of other small issues.

First, the sheet of aluminum that we ordered from Discount Steel for the street-side lower rear panel looked funny when it arrived. It’s the piece that we shared the video of Kyle cutting a couple weeks ago. It was dull, wouldn’t shine, and it seemed to look the same on both sides. It also didn’t match the piece that we had laser cut for the rear.

Read More

Cutting out the New Rear Street-side Panel

Cutting out the New Rear Street-side Panel

Here we're cutting the 0.040" 2024 T3 AlClad aluminum for the rear street-side lower panel replacement. Our previous panel was really beat up and rather than putting all the time on an English wheel to straighten it out, we elected to just replace the panel. This one is a little thicker compared to the original panel that was 0.032" thickness. After making a template from the old panel with cardboard, we marked up our panel and got to work! Here I'm using the Harbor Freight 18 gauge, 3.5 amp heavy duty metal shears. They cut through the aluminum like butter.

Read More

Rear Laser Cut Aluminum Sheet Arrived

Rear Laser Cut Aluminum Sheet Arrived

As we had previously posted, we had a new piece of a aluminum cut at Discount Steel and we received delivery today. Those with a discerning eye will identify that the piece is like a U-shape that encompasses the rear window.  This isn't exactly like the original.  When Jim did the shell-off restoration of the frame and the flooring, the new flooring ended up being a tad bit wider than the original.  Because of that, the rear of the shell didn't fit exactly back together where it was originally riveted.  Now, most would say, "Hey, that's not good", well, in this case it's actually okay with me.  I like the idea of this new aluminum, which I purchased at a slightly thicker grade than original (.040 vs. .032) will support the window better.  Also, the rivet holes that were drilled in the rear are a little too big for my comfort in the original pieces so this new piece will cover them over.  All in a good day's work!

Read More

Doing some exterior body work

 Doing some exterior body work

Wally had some dents and dings in his previous life! A few of them, we just weren't okay with leaving them where they were at.  One of the challenges of working with a 59 year old Airstream is the 59 year old aluminum skin.  While we have some AWESOME friends that have some amazing metal working skills (Rob is a master fabricator at Donnie Smith's in Blaine, MN), the metal is so old and oxidized that it has become brittle and a little more difficult than new to work with.  So, we're moving forward with removing the two rear panels that were the worst offenders and replacing them.  Drilling out rivets is fun! /sarcasm. 

Read More