Rebuilding Hehr 1009 Clearview Windows

The 1958-1960 Airstreams had awning-style Hehr Clearview windows. So, that means a couple things:

  • They’re pretty rare, however, parts are pretty readily available from Vintage Trailer Supply, so that’s nice.

  • There aren’t a lot of tutorials on how to fix them.

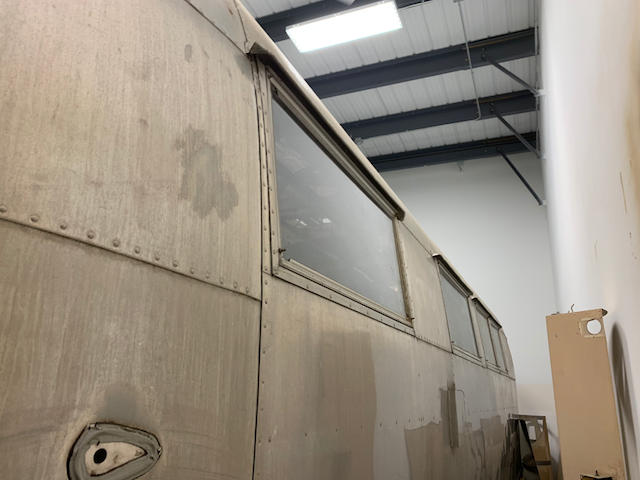
Ours are pretty ugly, they’re pitted quite a bit, they’ve clearly leaked quite a bit before, and some joker thought it was a good idea to seal them up with silicone caulk. Anyway, they’re ugly, we’re not in the business of having an ugly Airstream, so we decided to rebuild them.

Now, I’m going to lay it straight here (Kyle typing). It’s fun to tell people that we’re remodeling a 59 year old Airstream. It’s also fun to think about all the great times we’re going to have when we’re done remodeling our 59 year old Airstream. Today and these windows made me ask myself the following questions:

  • Are we ever going to finish this thing?

  • Why did we do this?

  • How much of a bath financially would I take on it if I just listed it and all of the crap I bought for it on ebay/Craigslist/LetGo/Facebook Marketplace/RV Trader/Star Tribune/Tampa Bay Times and walked away?

So, shortly thereafter, I came to my senses, Jackie encouraged me to stop being a little whiner and move on. Okay back to 3rd person…

Let’s talk about these windows. There’s essentially 4 parts to them:

  1. The aluminum frame

  2. The glass

  3. Double sided butyl tape to seal between the glass and the frame

  4. Hehr Clear-view Glazing Strip

IMG_0436.png

Clearview Window

Schematic for Window Rebuild

1958-1960 Airstream Windows

The frames are old. They have quite a bit of pitting and some corrosion. The glass is old and brittle. As far as we can tell, they’ve never been replaced. The factory glazing strips were originally made of a vinyl. Over the years of use and UV exposure they have shrunk in some cases as much as 2”. (The new replacements that we bought from Vintage Trailer Supply are a silicone-based formulation and are not supposed to shrink.) Then, the aforementioned joker, filled the gaps with silicone caulk. SUPER attractive. Lastly, is the factory installed butyl tape. Where it didn’t leak, it’s super strong. where it did leak, it’s awful and broken down and flaky. Here’s some foreshadowing, flaky is good. There’s not a lot of flaky.

Here’s the steps we followed to rebuild the windows, with some tips for the things that we did wrong:

  1. First, we cleaned the windows. There was about 50 years of dirt and debris all over them. They needed a good scrubbing which we did with warm water and Dove liquid dish detergent.

  2. Second, we removed the old vinyl glazing strips and tried to clean up all of the silicone caulk that previously mentioned joker used to seal them up.

  3. Third, we took a razorblade from the back side and attempted to separate the glass for the old butyl tape from the rear. Overall we were pretty successful at this. However, we mentioned that the old glass was brittle right? Well, we broke two windows. Not that big of a deal, we have a glass shop right up the street and it’s somewhat unlikely the old glass is tempered anyway. So, we’ll just replace them. There’s nothing we could have done differently here other than be a little more careful to not flex the glass.

    *Could have done better: Our thoughts were that it would be easier to soak the butyl tape in a orange-based solvent (GooGone) to loosen some things up prior to trying to separate the frame from the glass. So, we soaked it in GooGone. This made an enormous mess and even worse, the GooGone seemed to reactivate the butyl tape and made it sticky and nasty and pretty much the worst thing on earth to work with. After learning this lesson, we found it easier to separate the glass and frame with a razor blade easier and cleaner while it was dry. You hope to get as much as possible on the glass rather than the frame as it’s much easier to clean it off the glass than the frame.

  4. Fourth, you clean the glass with GooGone and a razor blade. Then, try to get as much of the butyl tape off of the aluminum frame as possible. Then, soak the remnants on the frame with GooGone and remove with a rag/paper towel a few hours later after it’s been softened. Warning: It’s a flipping mess.

  5. Fifth, clean off all of the GooGone with mineral spirits and as there was some old crusty adhesive in our frame pieces, we hit the frame with a wire wheel on a dremel to be sure that the new butyl tape has a great surface for adherence. We also elected to buff out the aluminum exterior frame at this point too since the glass is still out.

  6. Lastly, reapply the butyl tape, lay in the glass, and insert the new glazing strips into the frame.

When we type it all out, it doesn’t sound all the bad. It’s awful. We got about half-way through our 10 windows and it took most of the day. Give yourself enough time and make sure you bring your patience with you. It’s a long, frustrating process. But we’ll have some good looking, good as new, watertight windows for Wally the Airstream now.

Hehr Clearview Window Removal

It was time for us to get started on the windows. As we’ve mentioned in previous posts, the gaskets around our windows were made from vinyl originally from the factory. At the time it was a great flexible material to use. Unfortuantely, over great periods of time, 59 years for example, vinyl begins to shrink. From the photos below, you can see that at some point the gaps in the gaskets were filled with caulk. So, it’s time to take out the windows so that we can re-seal and polish them up. The video below and shows how to remove the windows so that we can begin to get them in order!

Got a Haul of Supplies from VTS

Vintage Trailer Supply is a great spot, ok, top spot to get all the vintage Airstream parts. They have a little bit of everything and have great advice for the parts that you need per unit/year. They’re insanely helpful. Give them a look. Here’s an unboxing of some replacement parts for our renovation!