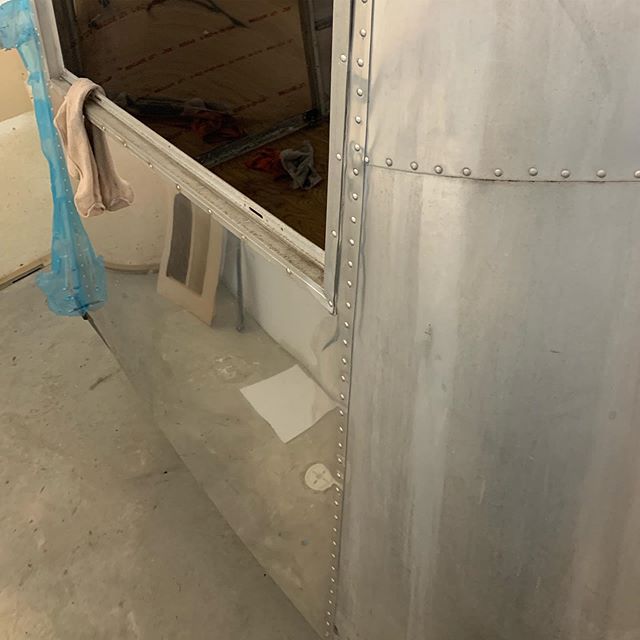
Getting the Street-side Rear Panel Sealed and Riveted
/With the back window fixed and riveted into the new rear back panel, it’s time to make our test fit of the street-side rear panel a little more permanent. There’s a few steps to doing this:
Lining everything up so it fits appropriately.
Remove old sealant/adhesive from the original panels. We used mineral spirits to remove the old adhesive and to clean the panels for good adhesion.
Buff the overlap areas. Again, we wanted to be sure that we’d have good adhesion between panels. It doesn’t help that Wally the Airstream is filthy from 60 years of dinge and dirt.
Drilling holes that match the original panels that overlap the new panel.
Applying the sealant/adhesive between panels. We’re using Sikaflex 221 (NASTY!).
Clipping it in with clecos in the newly drilled holes.
Insert the rivet into the hole. Pick a rivet length that just barely exceeds the thickness of the materials that are being bound.
Buck rivet the panels together.
We removed a few of the rivets from further up into the original panels so that we had some room to work. We started be replacing those rivets. We then moved aft and down from the corner to make sure that the aluminum stayed tight as we moved down and back.
Getting everything aligned took quite a bit of time and put Kyle over a little bit on patience. So we got it started and elected to stop there for the night. Later in the week we’ll come back and finish up getting this panel all connected. Once complete, the rear panel with the window will be attached. Things are moving quickly now.