Door Removal, Panel Removal, Panel Installation, & Roof Vent Removal - Part 2
/As we mentioned in part 1, we had a lot of working going on the last couple days! Here’s what was on the docket:
Remove and strip down the door-in-door door (Part 1)
Panel Removal (Part 2)
New Panel Installation (finally finishing it) (Part 3)
Beginning Roof Vent Removal (Part 4)
While we were taking the door off, we realized that the panel behind the door had some dings in it that would never look right after polishing. This was likely from years of abuse. There’s one piece of engineering that I’ve never been able to understand when it comes to Wally the Airstream. 99% of the things that they did in 1959 on these things, I agree with. Here’s one I don’t. The door has a suicide opening. Meaning, if you’re looking at the door, the hinges are on the left side. Now there’s a really good reason for this, the door opens from right to left and thus, the hinges don’t have to go where the 2 Hehr Clearview windows are stacked to the right of the door. It also means that when the door is open, it opens to the side where the old furnace and refrigerator stood and doesn’t block the windows. Ok, fine makes sense… But what doesn’t make sense at all is that if you accidentally don’t latch the door well enough, keep in mind Airstreams have a tendency to flex and change over time, when you’re cruising down the road at 65mph, if the wind catches the door and flings it open, you’ve created a hinged missile with a path of destruction for both the door handle and the panel to the left of the door.
This especially a problem when that Bargman 77 vertical lock that’s on the outside of the door is impossible to find replacements if it slams into the skin. Even better, it’s made of poured metal and a little brittle 60 years later. More than that, when one does show up on the market, they’re about $1400 for the set. So, yea. Let’s hope that doesn’t happen.
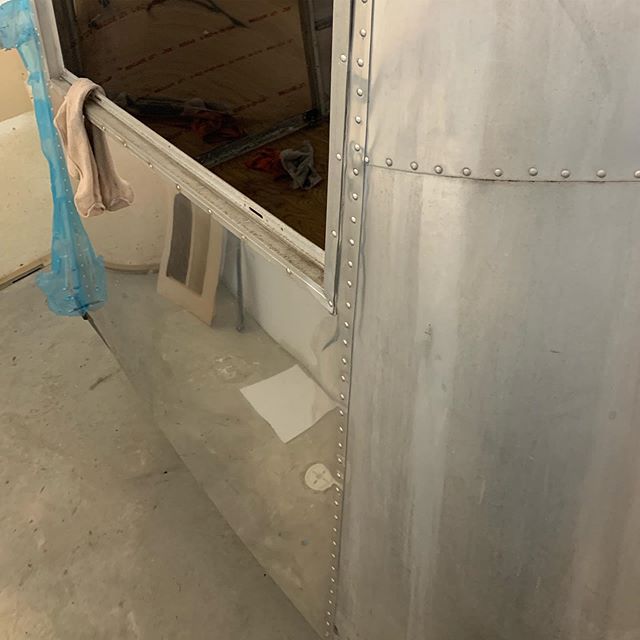
So, back to the original story, our hinged missile clearly made its way into the wall a few times as there were quite a few dents and as the aluminum is 60 years old, we decided, since we’re now Airstream panel fabrication specialists, to replace it with new.
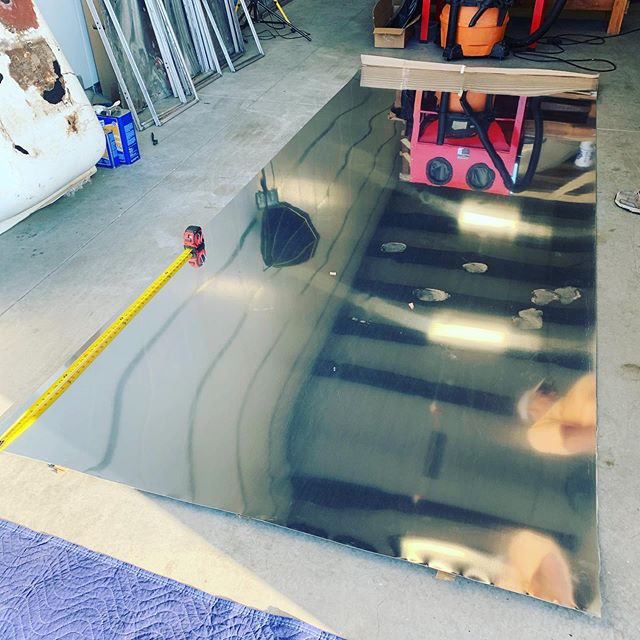
First step, decide where to run the new panel. This is the bottom curb-side panel that stretches from the door frame back to the rear lower cap on the exterior. As I didn’t need to replace the whole stretch and I didn’t want to have to un-rivet and re-rivet all of the bottoms of the windows, I elected to go to the stud that is just to the right (aft) of the windows in mid-cabin.
Second step, drill out all of the rivets.
Third step, Cut the panel with our electric shears and pull it down.
Here’s a video of the process:
Time to order some aluminum from Airparts! I’ll be back with Part 3 tomorrow!